
INTRODUCTION
Tripods are basically a three-legged stand for your camera. You already know that, though. What you may not know is that they can be a bit more complicated than that. There are numerous types of tripods out there, but thankfully, all of them function the same way.
Tripods are quite a useful piece of equipment, one that every, if not most, cameramen own. With its help, your photos will come out much more crisp and clear. During low-light situations, you can let your camera capture enough light to capture a gorgeous picture. What I am trying to say is: that tripods are quite useful. Now, enough beating around the bush, let me teach you how to attach the camera to a tripod:
HOW TO ATTACH THE CAMERA TO THE TRIPOD?
Step 1:
First off, you have to make sure that your camera can be put on a tripod. Most modern DSLRs and other types of cameras are tripod-capable, but on the off chance you are using an old camera, it is better to check. Once that is done, it is time to level your tripod.
Most tripods that I have owned have had a built-in bubble level that allows you to adjust the base of the tripod. If your tripod does not have that, don’t worry, as you can buy it at any camera equipment store for a fairly cheap price.
Place it on the base of the tripod and just do what we did above; level it. It is important to level your tripod because otherwise, it might come out tilted, and then that is additional editing you have to do later.
Step 2:
On every tripod, there is this thing called the “camera plate,” aka “tripod mount.” This is the piece that holds your camera and attaches it to the tripod. Using a quick-release button, lever, or clip, the camera plate will unlock, and then you can simply slide it off the tripod. Few points to keep in mind:
- It isn’t necessary that you remove the camera plate. You can keep it on and screw in your camera, but it is recommended that you do. It makes things easier, and you more securely screw the camera in.
- It is possible that the camera plate your tripod comes with is not compatible with your camera. In a situation like this, you must purchase a camera plate that is compatible with both your tripod and, of course, the camera.
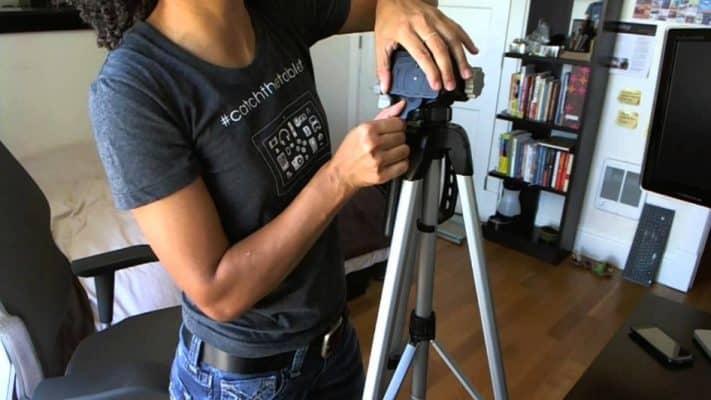
Step 3:
Now, it is time to mount the camera. Based on the type of tripod you have, you can either directly screw the camera on the tripod, or you might have to use a clamp to… clamp it into place.
So, I’ll divide this into 2 sections now; read the one you need:
i) Direct:
If there is no need for a clamp, you can directly screw the camera onto the tripod. Take the screws, and the camera plate should have matching screws, so it fits perfectly with both the tripod and the camera. This is essential, guys; otherwise, it could end badly. Make sure you have the matching screws.
Make sure not to tighten up the screws too much. You just need to tighten them up enough so the fit is proper. Tightening the screws too much may damage the plate. In case your plate isn’t able to twist, you might need to loosen up the screws on the underside to adjust it.
ii) Clamp in:
Some tripods use a clamp instead, so here is what you have to do. Take the camera and put it between the clamps. There will be some sort of tightening mechanism there, perhaps a screw you need to tighten or knobs. Whichever it is, twist it in the direction where it starts to tighten up.
When you feel like the clamp has a solid and secure grip on the camera, you can stop twisting. Do not tighten it too much, as this will damage both the camera and the clamp. You want a snug fit, not a tight fit. Big difference.
Step 4:
If you removed the camera plate as instructed, which again isn’t necessary, but does make things easier, it is time to reattach it. The process is the same. Pull the lever or press the release button, attach the camera plate or tripod mount, and then release the button/lever. All set.
Step 5:
Completion! You are good to go! Capture some stars, birds, fast cars, or whatever it is you like to photograph!
CONCLUSION
This article was to provide you guys with a step-by-step guide as to “how to attach the camera to a tripod.” It is very easy but can seem a bit intimidating in the beginning considering how expensive the equipment is and you do not want to drop it. Worry not though, follow the steps, and you’re golden. Thanks for reading!